How to Change Your ATV Oil: Part Three
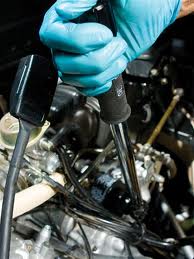
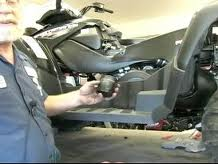
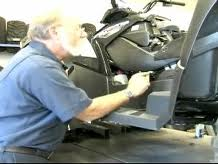
After you’ve found the oil filter and oil cap, it’s time to locate the drain plug. It will be positioned on the underside of the vehicle, so you’ll have to get a little dirty. Once you find the plug, place your oil pan directly underneath it. Open the drain plug and allow all of the used oil to run out.

Use your wrench to remove the oil filter while you are waiting for the oil to drain. Scrub off any gunk or oil on the mounting surface. Add some lubricant to the gasket of the new filter and screw it into place by hand. Secure the filter with a couple of turns from your wrench, but be careful not to over tighten it. By now the Yamamlube 2S oil should be finished draining, so put the plug back into place and discard the used oil properly.

Did you like this? Share it:

How to Change Your ATV Oil: Part Two

Before you remove the first panel and start digging around in your machine, be sure that you’ve gathered all of the necessary supplies close by. Move the ATV to a spacious area with level ground where you’ll be able to work comfortably. Fire up the machine and let it run for a few minutes. This will heat up the oil and disturb any deposits that may have settled at the bottom, allowing them to be removed with the old Yamalube 2W oil.

Once you’ve run the engine for a few minutes, remove any panels that may be obstructing your access to the filter and oil cap. The dipstick will be connected with the filter, which you can use to check you oil levels periodically. Now that you know where the new oil needs to go, tomorrow we’ll go over how to get the old oil out.

Did you like this? Share it:

How to Change Your ATV Oil: Part One

Like all vehicles, you need to change the oil in your ATV periodically to keep the engine running smoothly and prevent buildup. Since you will have to be dealing with the oil filter anyways, this is usually a good time to see if it needs to be replaced too. Before you begin, be sure that you have all of the necessary supplies with you. Here is a quick list of what to have at hand before you get started:

~Yamaha 2M or another leading oil
~Gloves
~Drain pan
~Funnel
~Extra oil filter
~Wrench
~Other necessary tools (varies by machine)
~Towels

Did you like this? Share it:

Yamaha History

With roots tracing back to the late 19th century, Yamaha has become one of the world’s leading manufacturers in a wide range of industries. Torakusu Yamaha, the eponymic entrepreneur, began his career as a watchmaker before taking over as the president of Nippon Gakki Co., which eventually become the Yamaha Corporation. The name has become so entrenched in society that many people forget that the company has only had the Yamaha name since the 100th anniversary in 1987.

Originally, Yamaha started out selling piano and reed organs. Although the company has since branched out into a variety of other industries—from motorcycles to Yamalube 2M—musical instrument manufacturing continues to be the foundation of the company. Currently, Yamaha is the world’s leading manufacturer of instruments and had recognized over $4.5 billion in revenue as of March 2009.

Did you like this? Share it:

Motor Oil: What is Sludge?

Sludge has been a star of gasoline ads for the last several years, but do you even know what it is or why you need to be protected against it. Oil will oxidize over time, and when this happens the additives in the oil separate out. These additives consequently breakdown and solidify, then are heated and turned into a gooey, viscous substance we now refer to as sludge.

The obvious question is how do you get rid of and prevent sludge; and unfortunately there’s no easy answer. Flushing the engine can be effective, but you also risk simply flushing the pieces of sludge to a more recessed part of the engine. The best way to handle sludge is by preventing it in the first place. You can do this by changing your oil regularly and only using premium products like Evinrude or Yamaha oil.

Did you like this? Share it:

Basic Outboard Maintenance: Part Three

Yesterday we went over some basic post-outing maintenance, which is essential to keep your engine running smoothly on a day-to-day basis. But for longevity, you’ll want to also go through a more extensive maintenance routine periodically. I do this routine about once a month during the season and when putting my boat in and taking it out of storage.

First, check the fuel and Yamaha 2M oil in the tank to ensure there isn’t any water in it; actually, I do this before and after each outing. Inspect the fuel line for any cracks or signs of wear and corrosion. The fuel primer bulb obviously should not have any cracks, and it should also feel pliable. Examine the fuel tank for damage and ensure the tank vent is aspirating properly.

Did you like this? Share it:

Basic Boat Trailering: Part Three

Yesterday we covered how to launch your boat at the dock, so today it’s time for the other half of the equation: getting your vessel back on the trailer. Although the two tasks are similar, many people get into trouble during this part. The easiest method is to use two people.

Start by dropping someone off at the dock to go get the vehicle; I recommend leaving the most experienced boater at the helm. Once you drop the person off, cruise around the no wake zone until they return with the car and trailer. After they’ve backed the trailer into the water, approach it head-on with the boat. Here is where most people go wrong; they cut the engine too soon, meaning the boat has to be guided by hand onto the trailer. Instead, coast in slowly and cut the engine after you have some momentum built up. Have the driver waiting at the trailer to quickly secure the boat. Before you leave the ramp, make sure your skis, flags, Yamaha 2W oil and other supplies are tied down and secure.

Did you like this? Share it:

Preventative Outboard Motor Care: Part Four

If you find the water used to flush your engine is hot or has debris in it, the most common culprit is some grime stuck in the flow tube. Insert a small piece of wire into the flow tube to dislodge whatever is blocking the system. If this doesn’t work, more often than not it’s a serious problem with the water pump, and you’ll have to take the boat to your mechanic. Once you’ve successfully flushed the engine, it’s time to move on to the other systems.

Disconnect the fuel line so the engine has an opportunity to burn all of the gas and outboard motor oil in the carburetor. A quick caveat: Always use fresh fuel in your vessel, so if the gas has been sitting around for more than two months, get rid of it. In addition to burning the excess fuel in the carb, also be sure to check the fuel line for cracks and signs of wear. In our final installment tomorrow, we will finish checking the fuel systems and cover a few more steps you can take to preserve your boat.

Did you like this? Share it: