Preseason Boat Maintenance: Part Two

If you’ve had a boat for several years, making a checklist of your maintenance routine may seem superfluous. You are probably saying to yourself, “How could I forget to top off my Evinrude xd100 oil!?” The truth is that all of us, no matter how qualified, will inevitably overlook minute details every now and again. A recent book by Atul Gawande, ‘The Checklist Manifesto’, expounds the merits of checklists, using doctors as a primary example.

For those well versed in the nuances of boat maintenance, it is probably safe to generate your own checklist to go through. However, there are several websites where you can find convenient comprehensive lists that can be printed off. Another option is to compile the tips and advice from this blog to create your own custom list.

Did you like this? Share it:

Preseason Boat Maintenance: Part One

Although it will be several weeks or months—depending on where you live—until boat season is in full swing, it is never to early to start tuning up your craft and preparing for some fun on the water. Personally, I like to go through my checklists and make any necessary repairs well before I take out my boat. This is ensures that I don’t lose valuable time on the water to mundane maintenance.

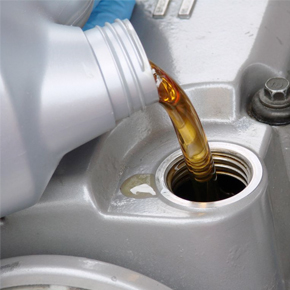
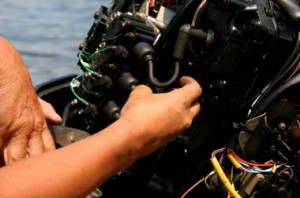
Over the next few days, we’ll review all of the key components and systems you should insect prior using your boat—from changing the outboard motor oil to inspecting the motor for damage. One of the most important aspects to boat care, and one which is often overlooked, is the necessity of keeping your boat clean. Maintaining a clean craft and applying a good coat of wax will help minimize the damage that is inflicted during normal use.

Did you like this? Share it:

Making a Outboard Motor Oil Switch

Up until last boating season, I had been using the same brand of oil in my boat for over 20 years. As the saying goes, “if it isn’t broke, don’t fix it.” As it turns out, something was broken. When I took my craft in after experiencing some grinding in the motor, I was told that my oil was doing an insufficient job of providing lubrication. Apparently, the oil that I had grown so fond of was now considered the “cheap” version and not intended for use in high-mileage boats.

The owner of the shop suggested that I switch to Evinrude XD 100. It is the highest quality oil that Evinrude produces and is one of the most trusted products on the market. All of the oil’s specifications exceed the minimum standards, which is especially important with the astronomical number of miles I’ve put on my boat.

Did you like this? Share it:

ATV Troubleshooting: Choosing Your Oil

Since this blog is dedicated to outboard motor oil, we couldn’t do a series on ATV Troubleshooting without touching on the subject. ATVs are available with two or four-stroke motors, and the type of engine you have will dictate the oil that you should use. In a four-stroke, the oil and gas are separate and the engine is air-cooled. The oil you choose will depend in large part on the weather conditions you are planning to face.

In hotter temperatures, go with a heavier oil, which will provide more protection against the heat. For colder climates, a lighter oil is needed to maintain its viscosity. If you are operating a two-stroke ATV, you can either mix motor oil with your fuel or use a special fluid that your manufacturer has developed. No matter what type of oil or lubricant you put into your ATV, always opt for a quality product; cheap oil may look attractive, but when your engine seizes up, you’ll pay the price.

Did you like this? Share it:

ATV Troubleshooting: Vehicle Won’t Start

All of the other maintenance tips and advice that we offer up in this blog are superfluous if you can’t even get your machine to start. There are myriad things that could be preventing your vehicle from starting, and here is a quick run through of some of the most common:

~Air Filter: the ATV needs to bring in air to mix with the fuel and Yamalube oil, and if the filter is dirty, it impedes the process.

~Exhaust: the motor also needs to release air, so make sure that the exhaust pipe is clear.

~Spark: there are several reasons why the motor might not be generating a spark when your try to start it, including the spark plugs, wires, pulse generator and the reverse or ignition switches.

~Compression: worn cylinders, rings, valves and gaskets could be keeping the compression too low.

~Carburetor: the carburetor is a critical component to any engine, maintaining the ratio of fuel, oil and water; refer to last week’s post for maintenance tips.

Once your vehicle is up and running smoothly, you might find yourself considering selling it down the line. Understanding the value of your car is crucial in this process, and you may wonder, how much is my car worth? Determining the worth of your vehicle involves various factors such as its age, mileage, condition, and market demand. Conducting thorough research, utilizing online valuation tools, and consulting with experts can help you gauge an accurate estimate of your car’s value.

Additionally, factors like maintenance history, upgrades, and market trends can influence the final selling price.

Just as sellers meticulously assess their vehicle’s worth, buyers must conduct thorough research to ensure they’re making a sound investment. Utilizing online resources and valuation tools, prospective buyers can gain insights into the fair market value of the used california car deals they’re eyeing. Moreover, consulting with automotive experts or trusted mechanics can provide valuable guidance regarding the condition and potential maintenance costs associated with the vehicle, further assisting buyers in making informed decisions.

In addition to conducting meticulous research, savvy buyers can explore avenues for maximizing their savings when purchasing a vehicle. One effective strategy is to consider options like cheap tax cars for sale, which offer reduced tax liabilities and lower overall ownership costs. By prioritizing vehicles with favorable tax rates, buyers can stretch their budgets further and potentially secure a better deal on their purchase. With thorough research and strategic decision-making, buyers can not only find the perfect used car deal but also maximize their savings and enjoy a cost-effective ownership experience.

This meticulous approach allows buyers to align their budgetary constraints with their desired specifications, ultimately facilitating a more informed and confident decision-making process.

Did you like this? Share it:

ATV Troubleshooting: The Clutch

There is a litany of things that could go wrong with your ATV, but one of the most annoying and difficult to diagnose problems is a sticky clutch. If your clutch isn’t disengaging properly, it is probably one of three things. Obviously, the clutch could be broken, and you should inspect it thoroughly for any blatant damage. Once you ensure there is no serious defect, look to see if the cable needs oiling or if there are any spots that are worn down on the clutch basket.

Another problem that people often encounter with their clutch is that it grabs when shifting out of idle. In this instance, the first thing to do is check the adjustment and look for warped clutch plates. If these look okay, it is likely that your mixture of Evinrude XD100 oil and transmission fluid is too heavy. The final major hiccup with the clutch system is slipping. Usually the same culprits that make the clutch grab are responsible here as well, although you should be sure to check the clutch springs too.

Did you like this? Share it:

ATV Troubleshooting

In this blog, we cover many of the basic maintenance procedures for ATVs and other similar vehicles. However, we sometimes glaze over some of the most fundamental questions that ATV owners raise. Over the next few days, we’ll be answering some of the most frequently asked questions pertaining to basic maintenance and upkeep of ATVs—from what outboard motor oil to use, to the basics of the crankshaft.

Today we’ll start by reviewing one of the most commonly neglected components of the vehicle, the air filter. A dirty air filter will not adequately capture dirt, meaning that gunk and particles will be able to reach your engine. It is crucial to clean the air filter on a regular basis, especially for those with an open-air box. You can clean your air filter without necessarily having to replace it with a new one; doing this routinely will help extend its life.

Did you like this? Share it:

An Oil Education

I have to admit; the first time that I went to purchase outboard motor oil, I was overwhelmed by the wealth of options that were available. Not only were there different brand names, but there were also a myriad of options within each brand. After staring blankly at the crowded shelf, I decided to seek some assistance. I told one of the staff at the store what type of boat I had and he was able to be of some assistance.

Now that I have a more thorough understanding of engines, I know what to look for in oil and other products. Economical oils were my M.O. back in those early days, but now that I have invested in a top-tier watercraft, I want to ensure its longevity. I look for oils that have a high viscosity and flash point, such as Evinrude XD 100.

Did you like this? Share it:

Jetting Your Carburetor: Part Four

Now that we’ve covered the two primary circuits of the carburetor, the final components to review are the pilot jet and the pilot screw. These mechanisms control the flow of fuel and outboard motor oil in a two-stroke engine when the throttle is in the idle position up to one-eighth open. Much akin to the main jet, the pilot jet is essentially a screw that is equipped with a calibrated hole.

Like the other two circuits, a high number on the pilot jet indicates a larger opening and a richer mixture of fuel. The pilot screw works like the one on the main jet; tightening the screw makes the mixture leaner, and vice-versa. By adjusting the three circuits that we have covered over this week, you will be able to fine-tune the richness of your fuel to air ratio and customize how your engine runs.

Did you like this? Share it:

Jetting Your Carburetor: Part Three

Just as the main jet controls the flow of fuel and bulk motor oil when the throttle is open, the needle and needle jet take over when the throttle is anywhere from one-eighth to three-quarters open. Since your engine is operating in this range the majority of the time, this carb circuit generally gets the most use. When making adjustments, the needle itself rarely needs any tuning.

As the throttle opens, the needle is pulled up. This allows an increased flow of fuel and oil. If need be, you can make minor adjustments using the clip that is on the needle; raising the clip will make the mixture leaner, and vice-versa. Tomorrow we will go over the final circuit of the carburetor, the pilot jet and pilot screw.

Did you like this? Share it:

Jetting Your Carburetor: Part Two

Yesterday we introduced the purpose of jetting a carb and quickly overviewed the three main circuits. Depending on whether you have a four or two-stroke engine, the carburetor adjusts the ratio of fuel to air or of fuel and Evinrude XD100 oil and air, respectively. Today we will be examining the main jet more closely and seeing the impact that it has on your vehicle.

When the throttle is more than three-quarters of the way open, the main jet comes into play. At this point, the needle is high enough that the main jet is now controlling the flow of fuel. The main jet is categorized by a number that indicates the size of its hole; the bigger the number, the larger the hole. A higher number will allow more fuel to get through the system, resulting in a richer fuel to oil ratio.

Did you like this? Share it:

Jetting Your Carburetor: Part One

Changing your outboard motor oil and doing other routine maintenance is important, but if you want to get the most out of your vehicle, you are going to have to do more than just routine maintenance. One of the most important components of your engine, with regards to the smoothness and efficiency of your ride, is the carburetor. The carb controls the ratio of fuel and air mixture that your engine uses. Finding the proper balance of these two variables will give your machine optimal power and reduce its emissions. The next few days we will be going over how to jet the carburetor on your ATV.

Before we begin, it is important to understand that there are three main carb circuits, each of which controls a range of throttle positions. The main jet is used when the throttle is three-quarters to fully open. When the throttle is open one-eighth to three-quarters, the needle jet is used, and for the final positions, the pilot jet and screw come into play. Tomorrow we will go into more detail with these carb circuits and begin discussing how to jet the carb.

Did you like this? Share it: