When Fish Attack

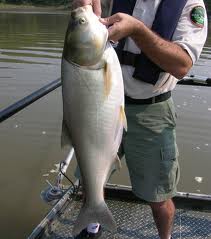
Shark Week isn’t the only time you can learn more about aquatic life. Last night as I was flipping the channels after dinner, I stumbled on a Discovery Channel program called “When Fish Attack.” The hour-long special detailed different freak marine accidents that have been caused by fish and other marine life. Surprisingly, there were less tales involving sharks than I thought.

There was a story about a young man who got seriously sliced up when a black Marlin that he was trying to reel in leapt toward his face. Another woman, an experienced deep sea diver, was dragged down 30 feet below the waves by a bottlenose whale. A man trying to bag a mako shark fell into the waves near his bait. Thankfully, all of these people survived and suffered little injury, but it just goes to show how unpredictable the ocean can be. Before your next seafaring adventure, make sure that all of your safety equipment is up to par and your engine is full of evinrude xd100 oil.

Did you like this? Share it:

Fixing an Outboard Motor Water Pump

The outboard motor water pump pumps water from the lower unit to the top of the motor. This process keeps your engine cool during use. Sand, shells, mud, and other debris that get caught in your water pump can cause damage. If left unchecked, debris can do enough damage to warrant replacing. To replace an outboard motor water pump, use the following guidelines:

Instructions:
1. Remove the bolts on the lover unit using a wrench. The make of your outboard will determine what size wrench to use.
2. Take the trim tab off the bottom of the anti-cavitation plate.
3. Be careful when removing the last bolt as this will detach the lower unit from the motor. You don’t want the unit to slide out uncontrollably!
4. Place the lower unit aside for now. The shift and motor shafts should now b exposed. Remove the shafts by applying pressure and sliding them out.
5. Remove the bolts from the plastic casing around the water pump. Lift the casing off.
6. Slide the pump impeller over the motor shaft and remove the steel plate along with the gasket the impeller was on.
7. Remove the steel cup and “o” ring out of the plastic casing (previously removed). Remove the key way from the motor shaft.
8. Lay the parts of your new water pump out neatly in your work space. Installation of the pump will take place exactly in reverse of the previous seven steps. Make sure to grease the tops of the motor and shift shafts, as well as grease and replace the bolts.

Since you’re already working on your boat, make sure to check the oil level and top off with Evinrude xd 100 oil when necessary.

Did you like this? Share it:

Beginners Guide to Changing Oil

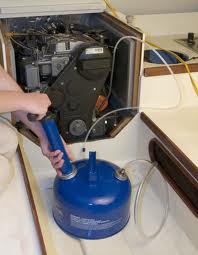
If you’re reading this blog, chances are you already know a lot about outboard motor oil, however; everyone can use a refresher course or first time instruction on how to properly change the oil on an outboard motor. Outboard motors are lubricated by oil and gas or by adding oil separately to the engine. Older two-stroke motors tend to use the oil-and-gas mixture, while newer four-stroke engines require oil added separately. Regardless of what engine you own, you’ll want to be able to change your own oil.

Before you begin you’ll need socket wrench, oil pan, rags, funnel, and outboard motor oil.

Instructions:
1. Pull your boat out of the water and place it on a trailer to access the outboard engine.
2. Remove the engine cover which will be secured by one or two latches. Pull down on the latch(es) and lift straight up to remove the cover.
3. Much like a car engine, you’ll want to check the dipstick. Pull the dipstick out of the crankcase and wipe it clean. Place the dipstick back in and pull it out again. If the oil is a dark color, it needs to be changed.
4. Trim the motor all the way up by pushing the trim button on the throttle or instrument panel.
5. Remove the drain plug from the bottom of the oil tank to allow the old oil to flow out into the oil pan.
6. Wipe off excess oil and replace the drain plug.
7. Add new oil to the engine by removing the cap to the oil tank and placing a small funnel in the opening. Pour the oil into the funnel. Check the dipstick to see how high the oil has reached. When the oil reaches full, you’re all set!

Did you like this? Share it:

Cavitation Part 2

Non-inertial cavitation involves tiny bubbles in a liquid being forced to oscillate from the input of energy. The intensity of the input energy is insufficient to cause total bubble collapse. This form of cavitation is less harmful than inertial cavitation. In fact, non-inertial cavitation can be used to clean delicate materials, like silicon wafers.

Cavitation occurs in outboard motors often as a result of a foreign object, like marine vegetation, getting caught on the lower unit, interrupting water flow into the propeller blades. Making sure your outboard engine is clean and free of debris will help prevent harmful cavitation. Also make sure to change lower unit gear lubricant and inspect the powerhead annually. As always, Evinrude xd100 oil is the best to use on your outboard engine.

Did you like this? Share it:

Cavitation Part 1

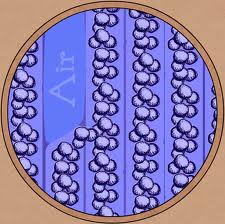
Cavitation is a condition where gas bubbles form within a liquid flow because of liquid pressure falling below the fluid vapor pressure. Inertial cavitation, or transient cavitation, and non-inertial cavitation are the two most common forms. Either way, cavitation is not desirable. Good pump design helps minimize the impact of the condition.

Inertial cavitation occurs when bubbles within the fluid form and collapse in rapid succession. The sudden collapse creates a shock wave which happens frequently in pumps, propellers, control valves, and impellers. The shock waves cause damage to the mechanism and working parts. It’s important to conduct preventative maintenance, like replacing the water pump impeller every 1-2 years and using the right outboard motor oil.

Did you like this? Share it:

Guide to Smooth Anchoring Part 5

Before you drop your anchor into the water you’ll want to ensure the safe and smooth dispersal of the rode into the water. The best way to handle this is to lay the rode out on the deck before dropping anchor to make sure it’s free of tangles. Once you’ve done this you’ll want to be sure to cleat off the rode where you want it to stop. If you forget this part then you could find yourself either abandoning your anchor or having to dive for it. Once that’s complete you’re almost ready to anchor.

Go up-wind or up-current of the area you’ve selected and drop your anchor so that it lays flat on the bottom. After you’ve dropped the anchor you’ll slowly back up to help ensure safe and even rode dispersal. It’s important to back up slowly to assure that the rode won’t foul the anchor and prevent it from digging into the bottom. Once all the rode has been let out you’ll want to back up with the engine idling in reverse to help get the anchor well planted. While backing up you’ll want to keep a hand on the anchor line. A dragging anchor will cause the rode to shake. A set anchor, on the other hand, will not shake the line, which means you’ve now got your anchor safely in place.

Don’t forget to stock up on Evinrude XD50 oil to get the most from your Evinrude 2-cycle engine.

Did you like this? Share it:

Guide to Smooth Anchoring Part 4

Choosing the right location is another vital aspect of safe and effective anchoring. You don’t want to be in a high traffic lane and you need to be protected from the wind as well as the current. Finding maximum shelter is essential to safe anchoring. You’ll also need to ensure that your boat can swing around the anchor point without running into other boats or obstacles like sandbars or beach heads. The current and the wind will inevitably affect your boat no matter how much shelter you find causing your boat to swing bow to the wind or current, whichever is stronger.

If there are other boaters nearby then ask them what scope they’re working with and plan your own location and scope around that. This will help ensure that you don’t collide with neighboring vessels. When you do anchor be sure to use the same method used by the nearby boat or boats. If they are anchored bow and stern then you should too. If they’re only anchored at the bow then don’t anchor from your stern. One thing you never want to do, however, is to anchor from the stern alone. This can cause the vessel to swamp or capsize, endangering the lives of everyone on board.

To get the most out of your boating experience try bulk Evinrude XD100 oil for optimum performance from your Evinrude 2-cycle engine.

Did you like this? Share it:

Guide to Smooth Anchoring Part 3

The line or chain that holds your anchor is called the anchor rode. Determining how much rode to put out is an important part of effective anchoring, but it does require a little math. The first measurement you’ll want to take is the vertical distance from the surface of the water to the point on your bow where the anchor rode attaches. Once you’ve determined that measurement you want to add it to the depth of the water. Let’s say it’s 2 feet from the point on your bow where the anchor is attached and the water you’re in is 23 feet deep. You’ll use the number 25 as the total distance between bow and bottom.

The length of rode being used is also called the scope.  Recreational boaters always want to have a minimum scope equal to five times the distance between bow and bottom out at all times. In overnight conditions you need to have out six to eight times that distance. This would put you at a scope of 125 feet during the day and a scope of 150-200 feet of rode out at night. The amount you’ll need will depend on current conditions but the above is an excellent general purpose approach to anchoring wherever your adventures take you.

And don’t forget one of the most important parts of boating: engine maintenance. Take the proper care of your Yamaha 2-cycle engine with Yamalube 2M oil.

Did you like this? Share it:

Guide to Smooth Anchoring Part 2

Choosing an anchor is the first step in getting the most out of your boating experience. There are three main types of anchors to choose from; the plow, the danforth or fluke and the mushroom anchor. Mushroom anchors simply don’t have the staying power of the other two and are recommended for small craft in light conditions. Trying to figure out which one best suits you, however, will begin with analyzing your boating habits. You have to ask the important question “How will I use this anchor,” in order to make the right decision.

Some people claim otherwise but there is no single anchor that is best in all conditions. The size of one’s boat is not the only thing that matters when considering anchoring. Differing marine conditions also have a tremendous effect on your vessel. Even a small boat can require a larger anchor if the conditions are severe enough to warrant it. A good place to start would be a local marine supply store where they’d be well-equipped to understand the particular conditions in your area. But when it comes time to buy some oil you can save a bundle when you buy Yamalube 2W oil in bulk.

Did you like this? Share it:

Guide to Smooth Anchoring Part 1

If you’re a boater then chances are you’ll either want or need to anchor at some point in your boating career. Whether it’s to stop and fish, swim or even stay overnight, anchoring is an important part of safe boating for several reasons. It can keep you stationary when bad weather is blowing your boat off course or if your engine isn’t working and you’re drifting into shallow water or even other boats. By keeping your boat from being blown or pushed off course an anchor helps you maintain your navigation and prevents your boat from being pushed into potentially hazardous conditions.

These reasons and more make anchoring an essential part of any boating experience. In addition to removing the ability to keep your boat in one place you’re also creating a potentially dangerous situation. Anchoring gives you the ability to avoid many dangerous situations, however. With proper anchoring you can get the most out of your boating and our guide to smooth anchoring will have you anchoring like a pro in no time.

Don’t forget to take a look at bulk Evinrude XD 50 oil as an affordable alternative to traditional retail 2-cycle engine oils.

Did you like this? Share it:

Flight of the Snowbird

Each year thousands of folks travel from New England down to winter homes in the south. These “snowbirds” are often retired people who keep their northern homes to be close to family and friends, but they want to enjoy their retirement-and escape the cold!- in the Carolinas, Georgia, and Florida. Rather than transport entire households twice a year, snowbirds keep their winter homes fully furnished and well stocked.

Part of a complete winter home includes a boat to use for fishing and entertaining friends. After sitting in the marina or dry-dock for several months, the boat is going to need a tune-up. All seasoned snowbirds know that as part of basic maintenance, evinrude XD100 oil should be used. By using the best oil for a 2-cycle engine, you can be sure that your boat will function for winters to come.

Did you like this? Share it:

Beginners Guide to Outboard Motors Part 4

Winterizing your outboard motor is an important task that must be completed each year. If you don’t winterize your motor you could end up regretting it when the motor stops functioning or loses efficiency. Of all the regular maintenance you’ll end up performing this one is easily among the most important. It’s of particular importance to anyone living in a cold climate.

A good place to start your winterizing is with a fuel stabilizer. It stops fuel break down which can leave nasty deposits in your motors moving parts. You should also change the oil and replace the gear lube. When you’re done, disconnect the battery and give the motor a good inspection to make sure there are no missing or loose parts. Make sure that it’s free of debris and check the props for damage or anything that might interfere with successful operation. Follow these few simple steps and you’ll extend the life of your motor and make your time on the water that much more fun.

If you end up with a 2-cycle Evinrude replace the oil with Evinrude XD50 oil for optimal performance and reliability.

Did you like this? Share it: