Boat Ownership: Part Three

As I mentioned to other day, you initial investment in your vessel is just that—the initial investment. Just like with a car, you will continually be sinking money into your boat. You may have the budget for a down payment and finance charges, but do you have the means for everything else? And will it really be worth it? Here is a quick rundown of some of the basic costs you’ll have to deal with:

~Finance Payments
~Registration (for boat and trailer) and licensing
~Insurance
~Dock Fees
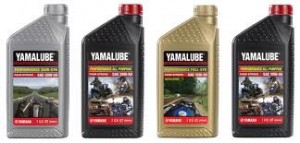
~Gas and Yamalube oil
~Dock Fees
~Taxes
~Storage
~Routine Maintenance

Did you like this? Share it:

The Anatomy of the Two-Stroke Engine: Part Two

Yesterday we covered some of the main advantages of the two-stroke engine, namely the fact that it is lightweight, uncomplicated and inexpensive. But two-stroke engines aren’t without their drawbacks, which will become apparent as we go through their cycle.

Like all internal combustion engines, two-stroke units operate on the simple principle of igniting fuel (in this case a mix of gasoline and Evinrude XD100) that releases energy and creates some sort of motion. The spark plug in a two-stroke engine fires every cycle, delivering consistent energy to the piston. Many of the components in the two-stroke engine serve multiple purposes, which allows the units to have a lightweight, compact construction.

Did you like this? Share it:

Basic Outboard Maintenance: Part Three

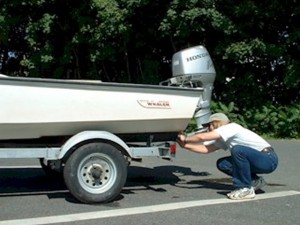
Yesterday we went over some basic post-outing maintenance, which is essential to keep your engine running smoothly on a day-to-day basis. But for longevity, you’ll want to also go through a more extensive maintenance routine periodically. I do this routine about once a month during the season and when putting my boat in and taking it out of storage.

First, check the fuel and Yamaha 2M oil in the tank to ensure there isn’t any water in it; actually, I do this before and after each outing. Inspect the fuel line for any cracks or signs of wear and corrosion. The fuel primer bulb obviously should not have any cracks, and it should also feel pliable. Examine the fuel tank for damage and ensure the tank vent is aspirating properly.

Did you like this? Share it:

Pulling a Water Skier: Part Two

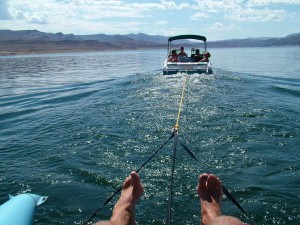
Once the towrope is taut, give it some gas and accelerate smoothly. A quick caveat before we continue with how to pull a skier: Be sure to adjust your ratio of gasoline to Yamalube oil carefully to ensure peak engine performance. Many people accelerate too slowly, which means the skier will be dragged under the water. Note that if the skier is only using one ski, you will want to give the boat a little extra juice.

After the skier is up, settle in at your cruising speed and head for open water. When making a turn, begin by angling the boat slightly to one side, then bringing it back around in a circle to the other side. Be sure to maintain your speed throughout the turn, as the boat will naturally slow down. Once the circle is complete, straighten your boat out so you are going the opposite direction from which you came. Tomorrow we’ll go over the protocol for when the skier goes down and cover some general safety tips.

Did you like this? Share it:

Basic Boat Trailering: Part Three

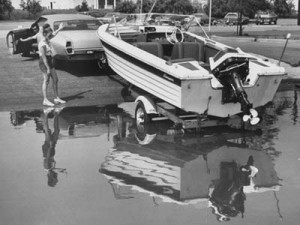
Yesterday we covered how to launch your boat at the dock, so today it’s time for the other half of the equation: getting your vessel back on the trailer. Although the two tasks are similar, many people get into trouble during this part. The easiest method is to use two people.

Start by dropping someone off at the dock to go get the vehicle; I recommend leaving the most experienced boater at the helm. Once you drop the person off, cruise around the no wake zone until they return with the car and trailer. After they’ve backed the trailer into the water, approach it head-on with the boat. Here is where most people go wrong; they cut the engine too soon, meaning the boat has to be guided by hand onto the trailer. Instead, coast in slowly and cut the engine after you have some momentum built up. Have the driver waiting at the trailer to quickly secure the boat. Before you leave the ramp, make sure your skis, flags, Yamaha 2W oil and other supplies are tied down and secure.

Did you like this? Share it:

Basic Boat Trailering: Part Two

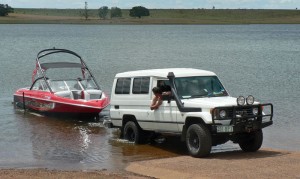
The first time you back your boat into the water it can certainly be daunting; I mean, it’s not everyday your supposed to back your vehicle towards a body of water. When you’re launching your boat, your trailer will obviously have to be submerged in the water. For some reason—unbeknownst to me—various trailer lights aren’t waterproof, which can lead to short-circuiting when they get wet. As such, always opt for the waterproof option.

If it’s your first time launching your boat (and even if you’ve done it hundreds of times), it’s a good idea to have someone get out and help guide you into the water. It doesn’t matter if the tires of the trailer get in the water, but you’ll want to avoid submerging the wheel hubs, which can lead to rust and corrosion. Once the boat can float, undo all of the ties and cables attaching it to the trailer and secure it to the dock. That probably seemed easy, so tomorrow we’ll go over the more difficult task: getting the boat back on the trailer.  Make sure you have all your essentials in the boat, life jackets, drinking water, cell phone and extra outboard motor oil.

Did you like this? Share it:

Buying a Boat: Part Three

Yesterday we examined the merits of both new and used boats. Since there is much more to take into consideration when purchasing a used watercraft, today we’ll take some time to go over some of the essentials to inspect before purchasing a used vessel. In addition to your personal examination, you will want to have a qualified marine surveyor do the same.

Begin by examining for signs of exterior damage; mismatched paint is often an indication of significant bodywork in the past. Check the upholstery, seals around windows and the entire hull thoroughly. Although you may not have an acute knowledge of marine engines, there are a few quick tricks that will give you an indication of how well the previous owner maintained the craft. Examine the oil and transmission fluid, testing for grit content, color and smell—if these fluids are in bad condition, chances are the boat wasn’t well-maintained. Also ensure the previous owner used premium products, such as Yamalube 2M oil.

Did you like this? Share it:

Outboard Motor Maintenance: Part Three

Now that the engine has been flushed, you can turn off the engine and turn your attention to the fuel aspect of engine maintenance. Never use fuel that is over two months old, which means you must refrain from using the same fuel from last season. Start by inspecting the fuel lines and primer bulb for cracks and other signs of wear. Ensure all of the fuel line fittings are secure and there is no rust on the fuel tanks or the clamps.

Open the engine cover and check to see if there is any leakage. Lubricate all of the moving parts in the engine, including the shift and carb valves. And if your have a four-stroke engine, don’t forget to change your Yamalube 2S oil.

Did you like this? Share it:

TC-W3 Certification: The Testing

The National Marin Manufacturers Association (NMMA) is the organization holding the trademark for TC-W3 and is responsible for all of the analysis. Each 2 cycle oil is put through a rigorous series of tests to ensure that it meets the highest lubrication standards under a range of conditions. A bench test is a trial conducted in a laboratory prior to a product being made available to the public.

To receive TC-W3 certification, every two-cycle oil must pass several bench tests, which include checks for viscosity, lubricity and fluidity, among others. Ring sticking and carbon buildup on the pistons are both checked for as well. Tomorrow we will look at the various engines that are used to test the oils and take a closer look at what it takes for an oil to be approved.

Did you like this? Share it:

How to Change Boat Motor Oil: Part Three

Now that we have familiarized ourselves with the two methods for extricating used oil, it’s time to go through the step-by-step process of actually changing your Yamaha 2w oil. You’ll want to start the engine before removing the oil, which serves dual purposes. Obviously this will heat the oil, making it easier to suck through the pump that you are using. Another reason for heating the engine is agitate the sediments that are dormant in the bottom of the oil pan, ensuring they will be sucked up through the pump.

When removing the oil, you will need a closeable receptacle to collect the fluid in. Look for a container that has a small opening for the hose and a sufficient volume—a milk jug is ideal. Remember, you can’t simply through away your used oil. It is important to take it to the marina or a service station that can recycle or dispose of the oil properly.

Did you like this? Share it:

ATV Troubleshooting: Vehicle Won’t Start

All of the other maintenance tips and advice that we offer up in this blog are superfluous if you can’t even get your machine to start. There are myriad things that could be preventing your vehicle from starting, and here is a quick run through of some of the most common:

~Air Filter: the ATV needs to bring in air to mix with the fuel and Yamalube oil, and if the filter is dirty, it impedes the process.

~Exhaust: the motor also needs to release air, so make sure that the exhaust pipe is clear.

~Spark: there are several reasons why the motor might not be generating a spark when your try to start it, including the spark plugs, wires, pulse generator and the reverse or ignition switches.

~Compression: worn cylinders, rings, valves and gaskets could be keeping the compression too low.

~Carburetor: the carburetor is a critical component to any engine, maintaining the ratio of fuel, oil and water; refer to last week’s post for maintenance tips.

Once your vehicle is up and running smoothly, you might find yourself considering selling it down the line. Understanding the value of your car is crucial in this process, and you may wonder, how much is my car worth? Determining the worth of your vehicle involves various factors such as its age, mileage, condition, and market demand. Conducting thorough research, utilizing online valuation tools, and consulting with experts can help you gauge an accurate estimate of your car’s value.

Additionally, factors like maintenance history, upgrades, and market trends can influence the final selling price.

Just as sellers meticulously assess their vehicle’s worth, buyers must conduct thorough research to ensure they’re making a sound investment. Utilizing online resources and valuation tools, prospective buyers can gain insights into the fair market value of the used california car deals they’re eyeing. Moreover, consulting with automotive experts or trusted mechanics can provide valuable guidance regarding the condition and potential maintenance costs associated with the vehicle, further assisting buyers in making informed decisions.

In addition to conducting meticulous research, savvy buyers can explore avenues for maximizing their savings when purchasing a vehicle. One effective strategy is to consider options like cheap tax cars for sale, which offer reduced tax liabilities and lower overall ownership costs. By prioritizing vehicles with favorable tax rates, buyers can stretch their budgets further and potentially secure a better deal on their purchase. With thorough research and strategic decision-making, buyers can not only find the perfect used car deal but also maximize their savings and enjoy a cost-effective ownership experience.

This meticulous approach allows buyers to align their budgetary constraints with their desired specifications, ultimately facilitating a more informed and confident decision-making process.

Did you like this? Share it:

ATV Season is Here

Spring officially started last weekend, and while for some people the season is a time for blooming flowers and love, spring only means one thing to me: ATV season. Like most ATVers, I love the mud, and springs in the Pacific Northwest give us an ample supply. I’ve been tied up with some chores and duties around the homestead, but I think that I will finally have a chance to take my ATV out this weekend.

In the next few days, I hope to be able to do all of my preseason ATV checks. If you’ve never done this before, it is fairly simple. You’ll want to thoroughly inspect your vehicle for any cracked or loose fittings, and be sure to top off the Yamalube 2w oil and other essential fluids.

Did you like this? Share it: